Project partner: Luhan Rong
Initial project idea
This used to be part of week 2 documentation and has been migrated to this page.
Some initial ideas I had (after a conversation with husband):
- A cube that gets annoyed or upset when it isn't put down the right way, and only responds contently if it's placed exactly the way it likes
- A cube that likes being held a certain way, coccooned in warmth
- A cube that finds solace in the dark and runs away seeking shelter in the shadows whenever someone approaches (and variations on this idea of it moving)
After talking to Luhan, we both ended up liking the idea of a cube with a cat like personality. In particular, I couldn't get this phrase out of my mind: "cats are a lesson in consent".
Components (tentative)
- Copper outer for capacitive sensing, except one frosted/translucent acrylic plate that lets LED light through
- RGB LED for visual feedback of cube mood
- PIR for detecting human presence?
- Vibration motor for haptic feedback: purring, angry shaking, etc.
- (STRETCH GOAL) accelerometer to detect if it has been picked up/which direction it has been put down.
Prototyping on breadboard
This used to be part of week 3 documentation and has been migrated to this page.
The idea for our Curious Cube is to mimick a cat, and to do that we decided on four components:
- IR sensor for sensing presence*
- Copper sheet to mimick capacitive touch
- LED for visual feedback
- Vibration motor for haptic feedback
*We're still trying to decide between PIR and time-of-flight sensor.
(More idea details in previous week write-up)
To start, we experimented with the PIR sensor. We wanted to use the PIR sensor since it detects motion via the long IR waves that our bodies emmit, we thought perhaps we'd be able to get away with putting the sensor in our cube without drilling a hole in the walls.

Unfortunately, it seemed that the acrylic we had was too thick so our body's IR waves wouldn't transmit through the acrylic and the PIR sensor wouldn't detect any motion. Because of that, we decided to switch to a time-of-flight sensor (but are now uncertain again since the time-of-flight sensor has such a short sensor distance).
Luhan put in the order for our components, and while waiting for them we decided to get started on the code. We simplified our interaction to the following (essentially a finite state machine):
Our final interactions are as follows:
- If cube is ASLEEP and person approaches, it wakes up and has 60% probability of entering PEACE mode and 40% of SENSITIVE mode
- If cube is in PEACE mode and person touches, 90% probability of HAPPY and 10% ANGRY
- If cube is in SENSITIVE mode and person touches, it will 100% go into ANGRY mode
- If cube is ASLEEP and person touches it, it will 100% go into ANGRY mode
And if person doesn't interact, the cube will reevaluate its state every 5 seconds:
- If cube is in PEACE mode, it has 80% probability of staying in PEACE and 20% of switching to SENSITIVE
- If cube is in SENSITIVE, 80% probability of staying in SENSITIVE and 20% switching to PEACE
- If cube is HAPPY, it has 60% probability of staying HAPPY and 40% of going back to PEACE
- If cube is ANGRY, it has 60% probability of staying ANGRY and 40% of going back to PEACE
Finally, if the cube isn't interacted with for a minute, it will go back to ASLEEP mode.
To make our coding easier, we started with a pushbutton and a capacitive sensor (from my Homemade Hardware homework haha) and logged to Serial to see if we were entering the correct modes with the correct probabilities:
Here is the code until this point.
When we were certain our code was behaving correctly, our next step was to add in the LEDs. Here are the different LED patterns (and eventually vibration pattern) depending on mode, drawn by Luhan:
We decided that ASLEEP mode wouldn't have any light or vibration, and all the other states would be a white light except for HAPPY—which would be yellow to reward the person for entering the "success" state.
Here it is going from PEACE to SENSITIVE (left video below), entering ANGRY mode (middle video), and HAPPY mode (right video):
And here is the final wiring with the vibration motor and PIR sensor swapped in:
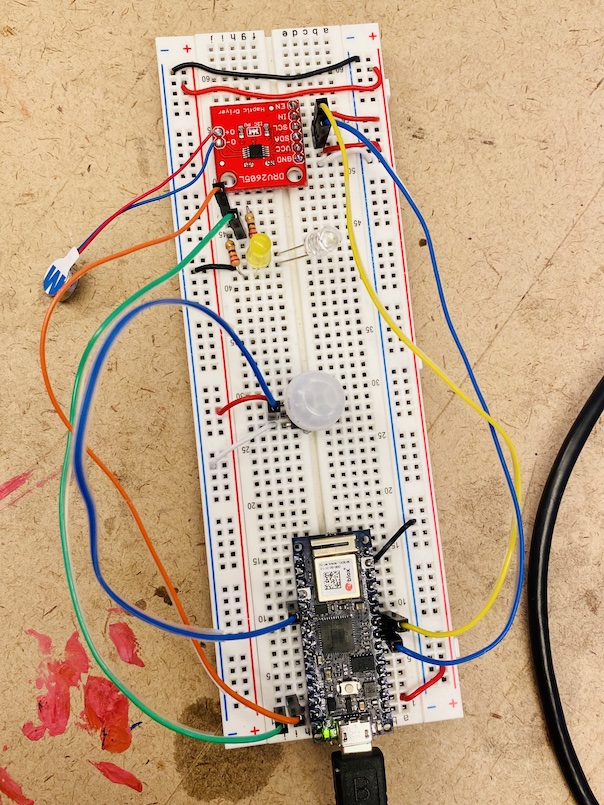
A note: the haptic motor driver (DRV2605) I borrowed from Tom is from Sparkfun, which has an extra pin that the Adafruit version doesn't have. So make sure to follow the Sparkfun wiring guide instead of Adafruit's, even though we're using Adafruit's library.
Fabrication
We decided not to make a cube from scratch and instead bought an acrylic box that Luhan did a beautiful job of wrapping in copper and sanding the lid to make it translucent. Because the copper tape we got was narrower than the cube, Luhan also soldered the strips together so that they'd all be continuous when we soldered the wires for CapSense to them:
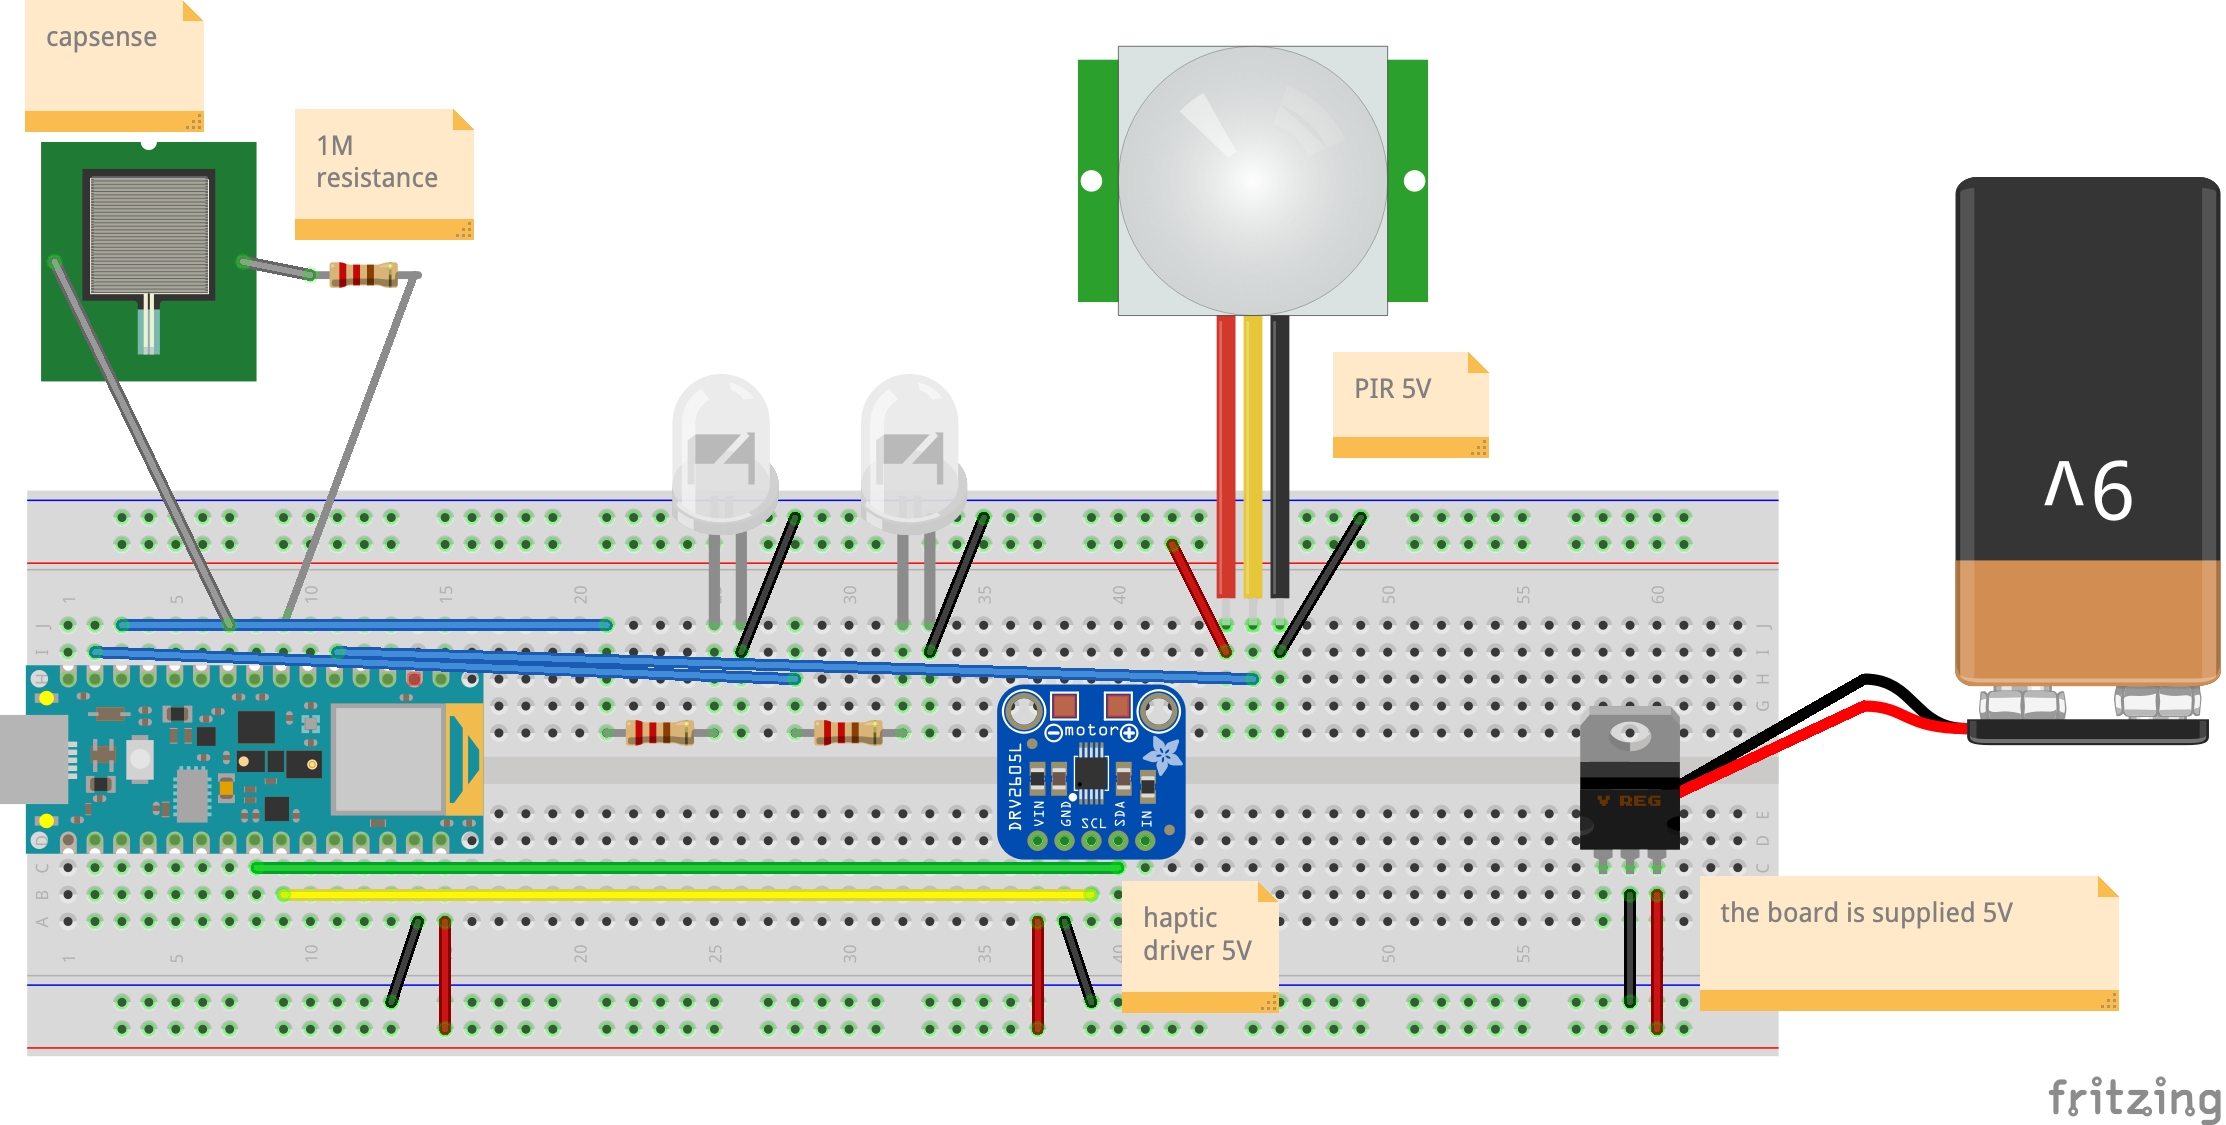
Because we wanted our cube to be stand-alone, we planned out in Fritzing what the schematic would look like using a battery instead of connecting to our laptop via USB (it was also just easier to refer to the Fritzing schematic instead of photos of our wiring):
And because I'm kind of extra and dislike wires falling out while people are handling the cube (especially if any wires fell out and accidentally touched the conductive copper tape), I suggested to Luhan that we use a protoboard and she was thankfully on board.
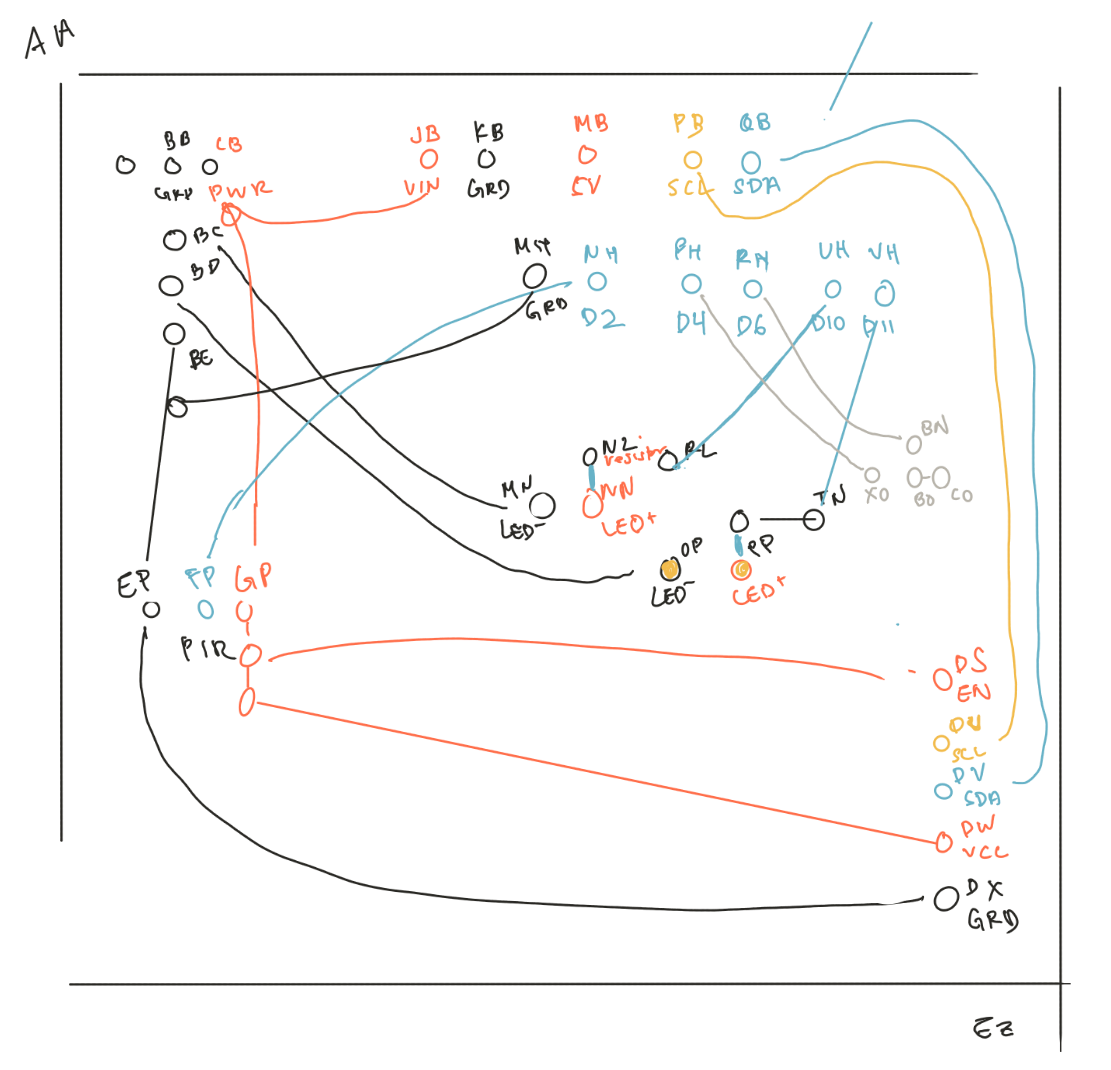
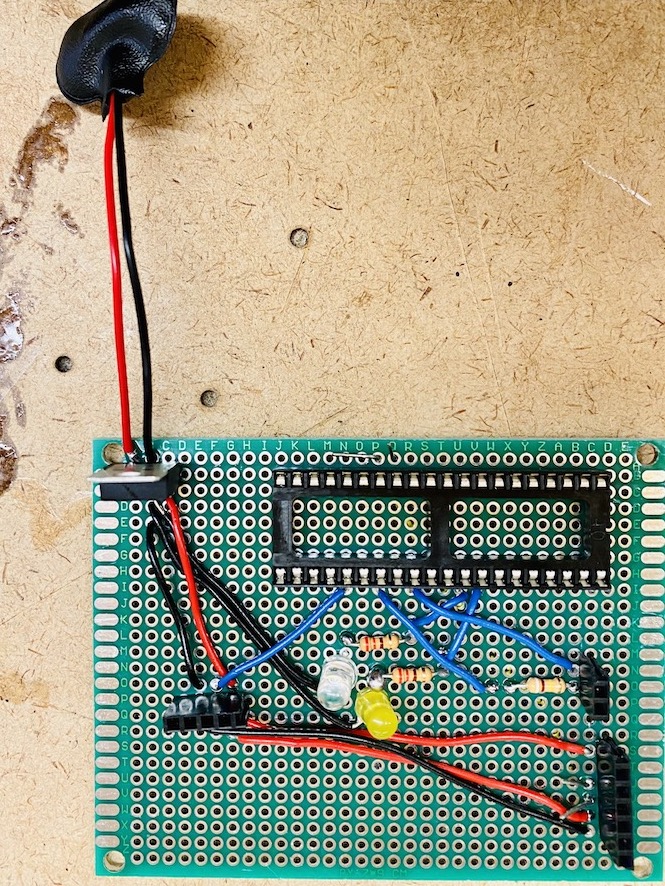
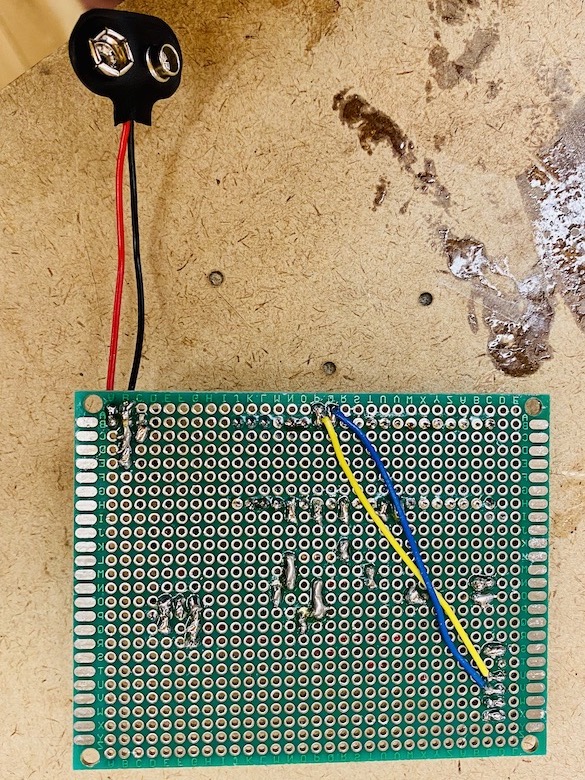
Here is the planning of where each component should go relative to the protoboard and the protoboard after it's been soldered—with header pins for the expensive pieces (Arduino, haptic driver, PIR) so that we could still take them out to use elsewhere!
But when we plugged all the components in, it didn't work. A small moment of panic later, we realized that we had forgotten to wire the Arduino's VIN and GRD 😅

With that taken care of, everything was working exactly as expected while the Arduino was plugged into the computer.
But the oddest thing happened: the CapSense stopped working when we plugged in the battery. No matter where on the copper we touched, it wouldn't respond. After much trial and error, Luhan noticed that the touch sensor would work when someone was holding the battery (it didn't even have to be the same person touching the copper).
We learned from Tom that when a circuit with CapSense moves to a battery source, we need to touch both copper connected to Arduino as well as copper connected to ground. Andy (Homemade Hardware) expanded on this further by explaining that the battery is a very noisy power source which effects how the CapSense library detects touch, and that it should work once we put capacitors by the power (VIN?) pin.
Here is the final cube: