Yay PCOMP! I actually got to audit this class with Danny Rozin back in 2019 and had such an amazing time (one of the reasons I applied to ITP) that decided to actually take the class because I didn't have the chance to do most of the assignments last time.
So thankfully, some of the material are review, and some of the material (especially in the extra readings) are completely new.
I'm taking the class with Tom Igoe this time around, and I really enjoyed two points he brought up in our first class:
- different controls (switches, toggles, etc.) have different feeling when we interact with them. The tactile feedback might be calm, panick-y, click-y, quiet, etc.
- implicit vs. explicit interaction: implicit is when someone's unintentional action triggers an action (like lights turning on when a motion detector is triggered), whereas explicit requires a person to make an intentional action to trigger an action.
When I design a data visualization, I often try to keep how my reader might feel while interacting with the viz, and I try to optimize for delight—it's a detail that I find really important. It didn't occur to me to apply the same attention to detail in the interactions we build, so it was delightful to learn and think about the tactile feedback a component might give as an important part of the experience.
Implicit interactions are harder to design for, because we have to make assumptions about the person interacting—did they mean to interact, or did our sensors pick them up on accident? Which brought about this gem of a discussion: capturing presence vs. attention.
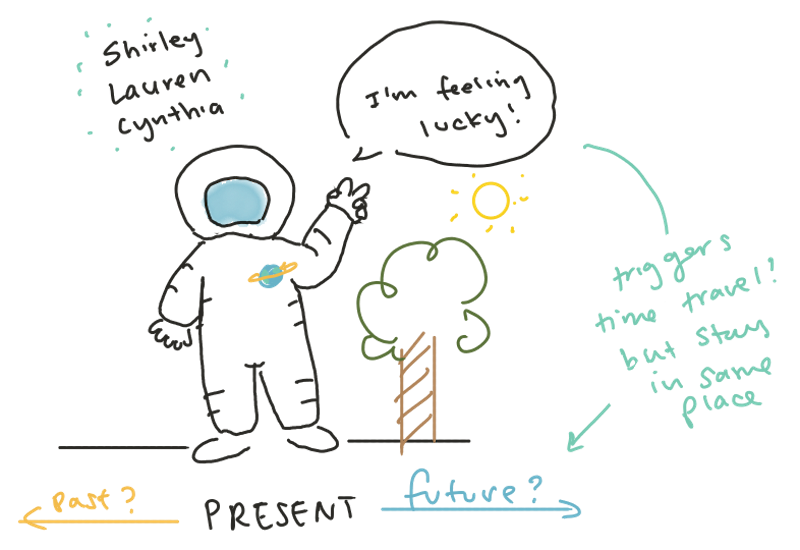
For the last half of class we were asked to design a "fantasy device", something that doesn't yet exist (and that doesn't necessarily need to follow the laws of physics). We had roughly 20 minutes to come up with the idea, and after bouncing some ideas around (including something akin to Dumbledore's pensieve), Lauren, Cynthia and I came up with the idea for a time traveling space suit (*≧ 艸 ≦)
A person would put on the suit, go to a destination of choice, and if they held up a piece sign and at the same time said "I'm feeling lucky", the space suit would transport them either forward or backwards in time—BUT to a random time. And they would stay in the same place. And though they can interact with the physical objects around them, they wouldn't be able to interact with any person or effect historical events (because butterfly effect).
Some of the feedback and questions we got:
- What happens if we're randomly transported back or forward in time enough that the space we're standing on is uninhabitable (like the middle of an ocean, or top of a volcano). Thankfully, Lauren was particularly concerned about this point and we had an answer ready: we'd put in constraint that the device wouldn't take a person anywhere dangerous. Also, space suit. Haha.
- We were also asked what if our original trigger (just saying "I'm feeling lucky") was said out of context and that unintentionally triggers the space suit, so we added the peace sign so that the trigger could be extra intentional
- How does the person get back? We didn't think about that one at all!
Overall, it was a fun exercise in thinking of constraints but also edge cases.
Lab: power supply
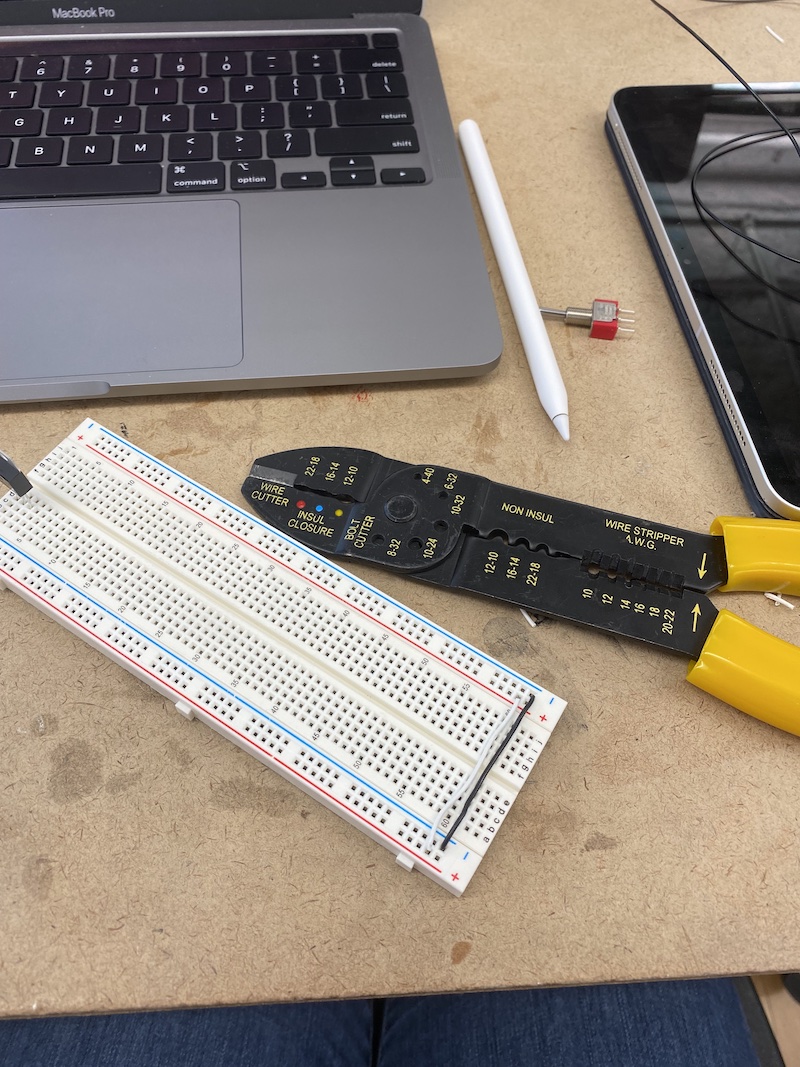
Because the last time around I only used the Arduino (connected to my laptop) as a power supply, I really wanted to understand how to hook up a power supply directly from the wall and not have to worry about batteries either.
After going through this video on electrical measurements a few times, I was finally able to put together the following:
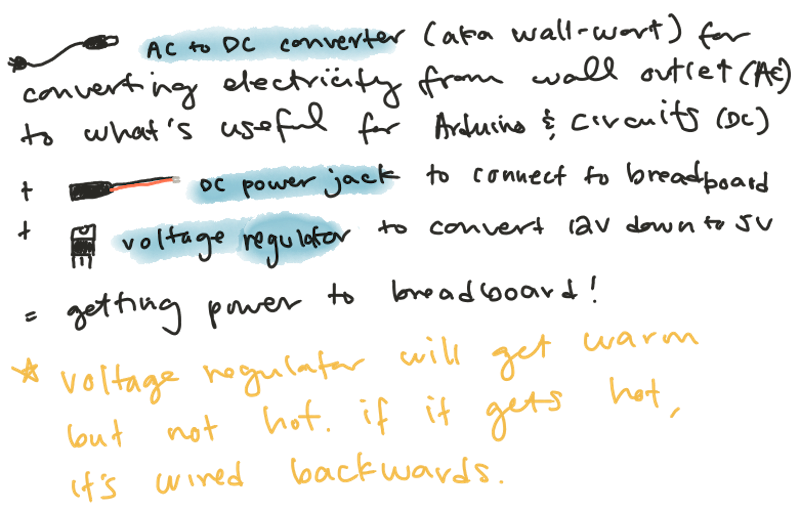
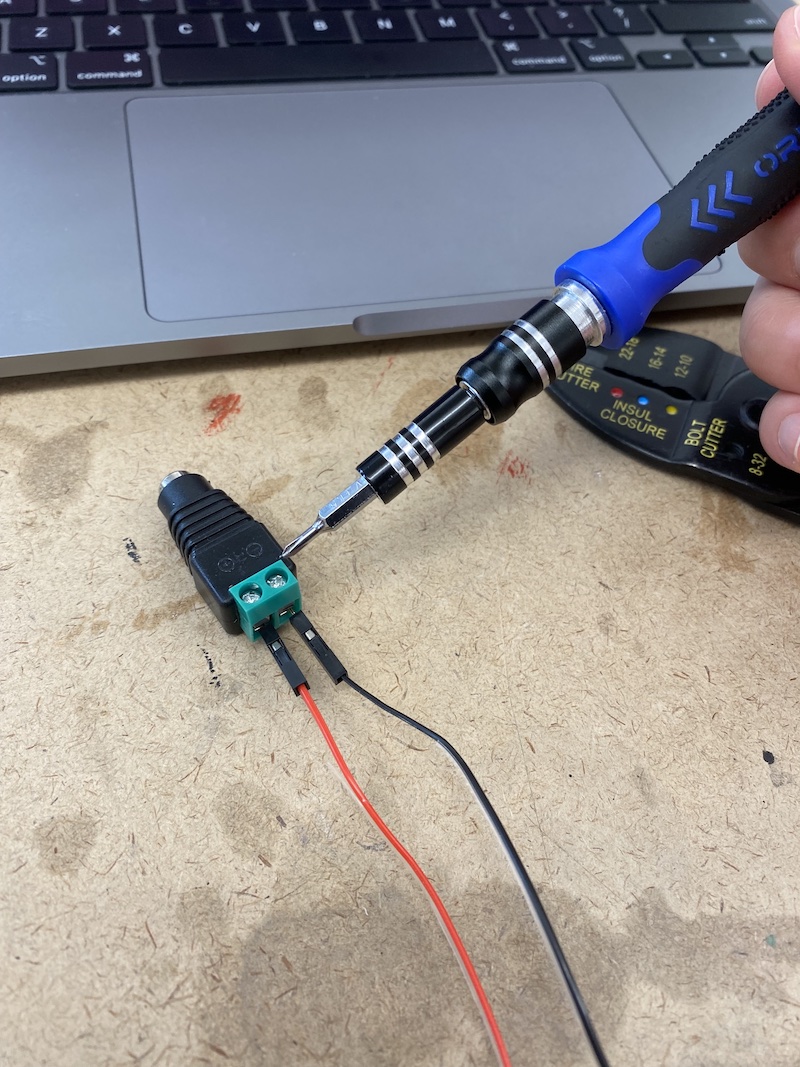
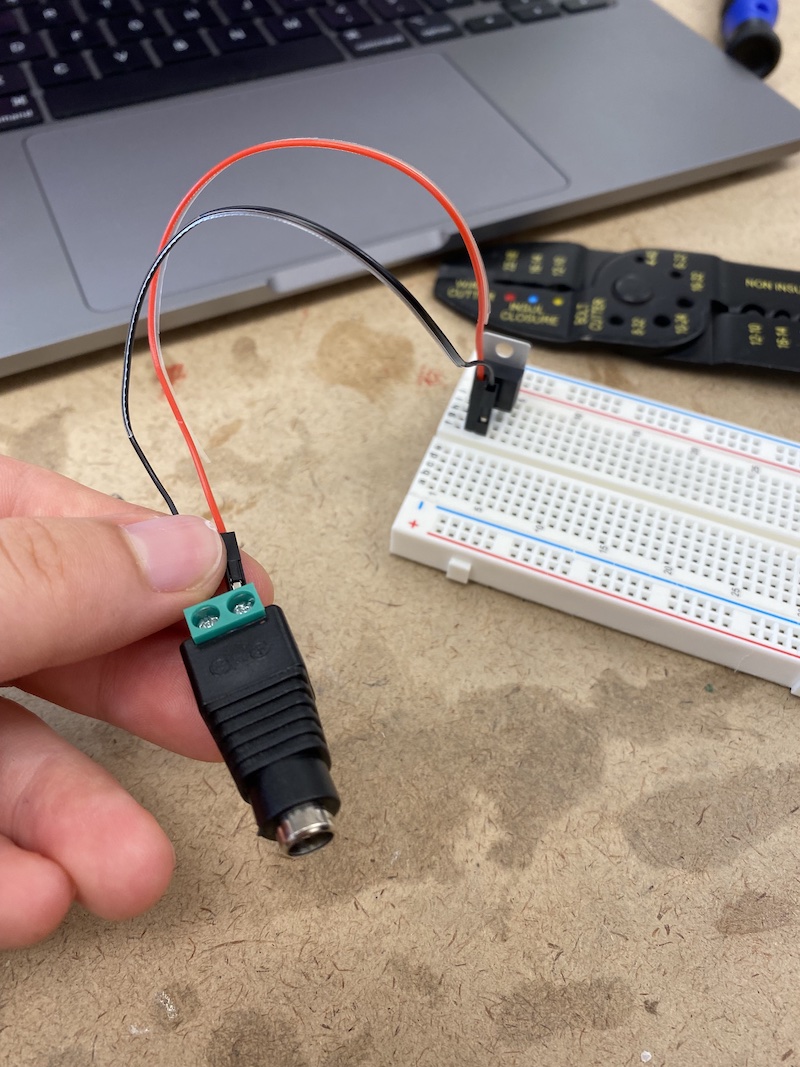
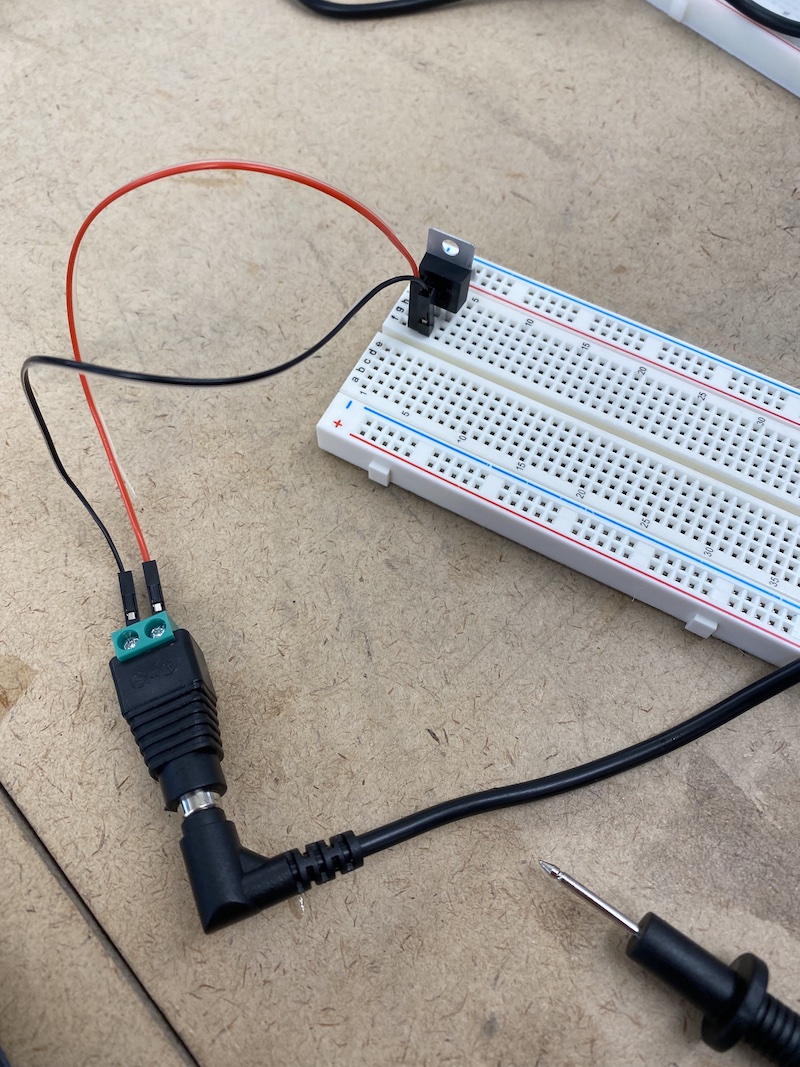
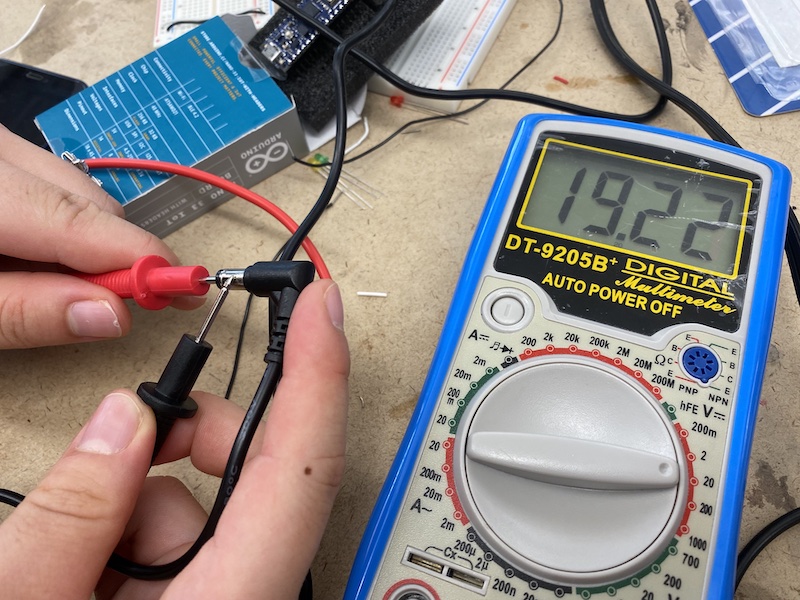
We then made sure to check the voltage coming out of the AC to DC converter, and it turned out to be 19V, which was too much for the 7805 voltage regular we had on hand. But alas, there weren't any other converters available, so we forged ahead.
We then put a 220ohm resistor and LED onto the breadboard to see if it'd light up with the power supply hooked up. Our first attempt didn't work (I still haven't quite puzzled through what was wrong with the wiring), but thankfully Shannon did some quick edits and the LED lit up!
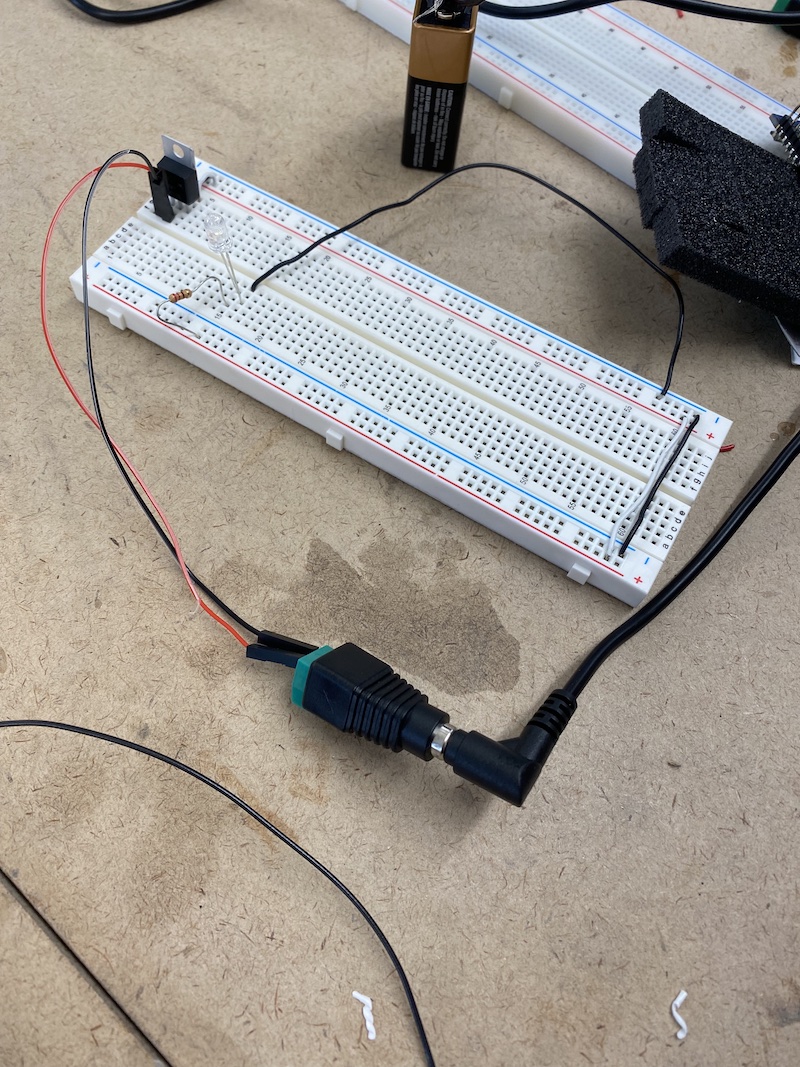
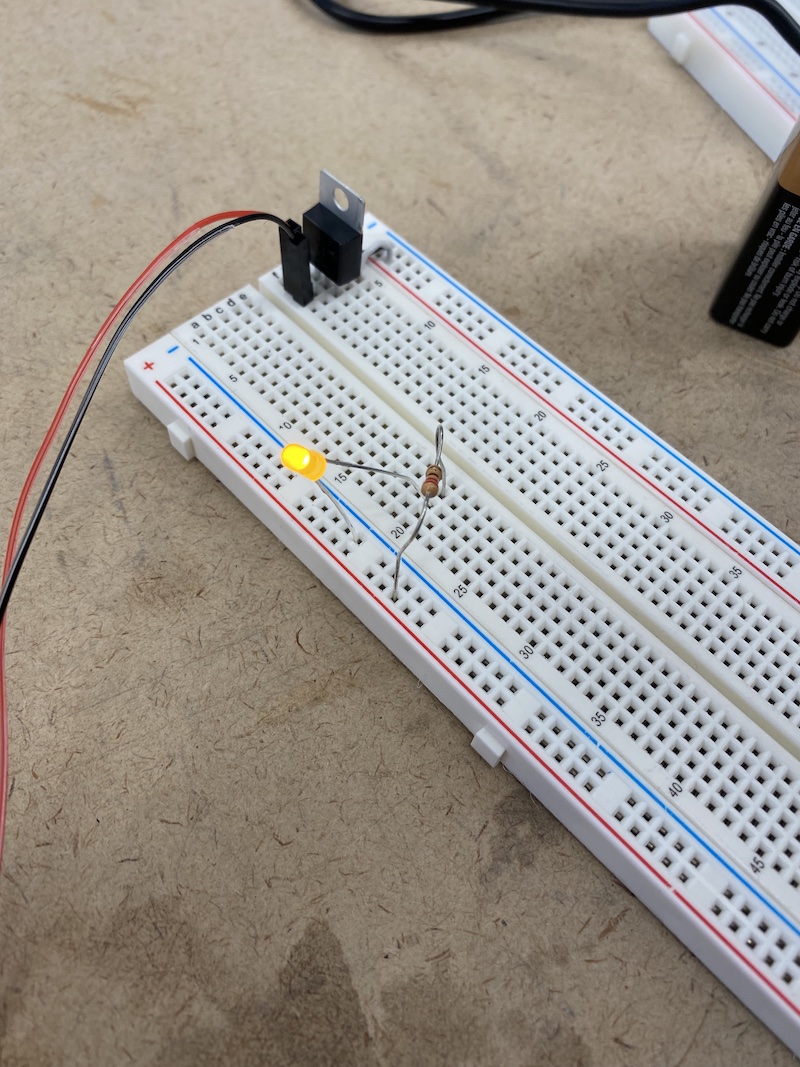

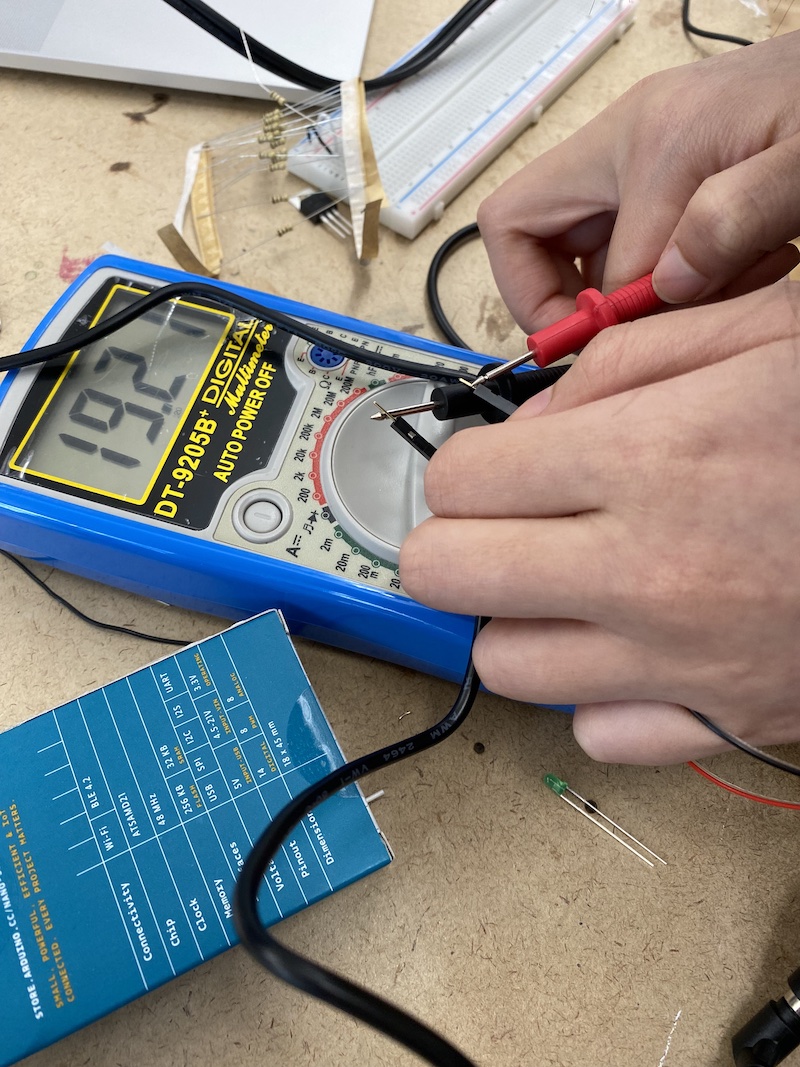
When we measured the voltage going into the LED, it read 1.95V. I had read that LEDs operate around 2.5V, so I wasn't sure if this was within the acceptable range or not—or if because we were getting 19V from our power supply (which was too much for our voltage regulator), if something was going wrong.
Which I guess it was, because apparently right after, the LED burned out. So that's my first lesson in not giving components more voltage then it needs (^◇^;)
Lab: measuring electricity
This lab took me a really long time, because it includes me trying to intuitively understand the difference between voltage and current.
multimeter
connectivity
resistance -> potentiometer, sensors
voltage -> LED, how to calculate? series vs. parallel
Lab: LEDs
...working on this...
Lab: switches
...working on this...